

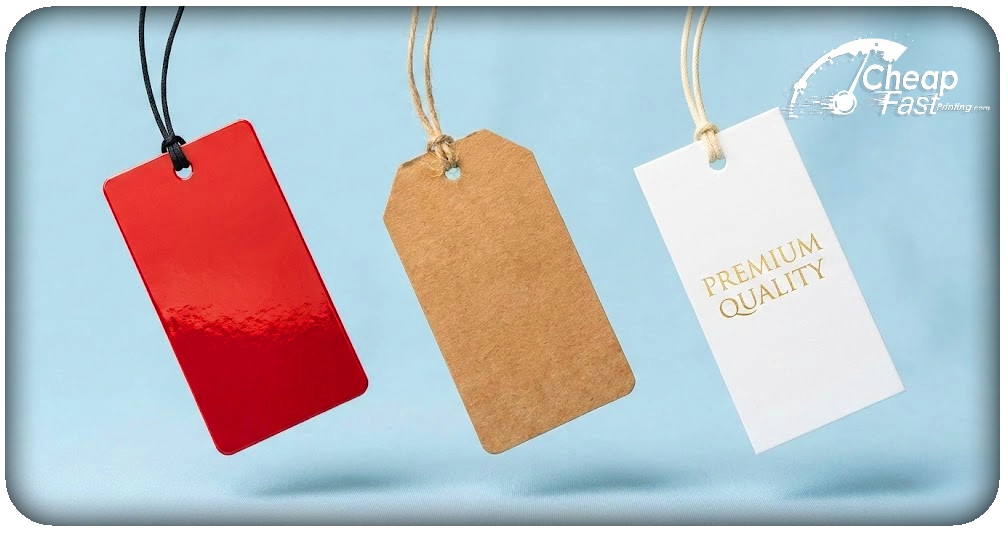
Figuring out what are the right hang tag dimensions needed for your particulat store product? When you’re standing in a boutique and reach for a garment, what’s the first thing you look at? For most shoppers, it’s the hang tag. That small piece of cardstock dangling from a string carries more weight than you might think, it tells your brand’s story, displays your price, and creates that crucial first impression.
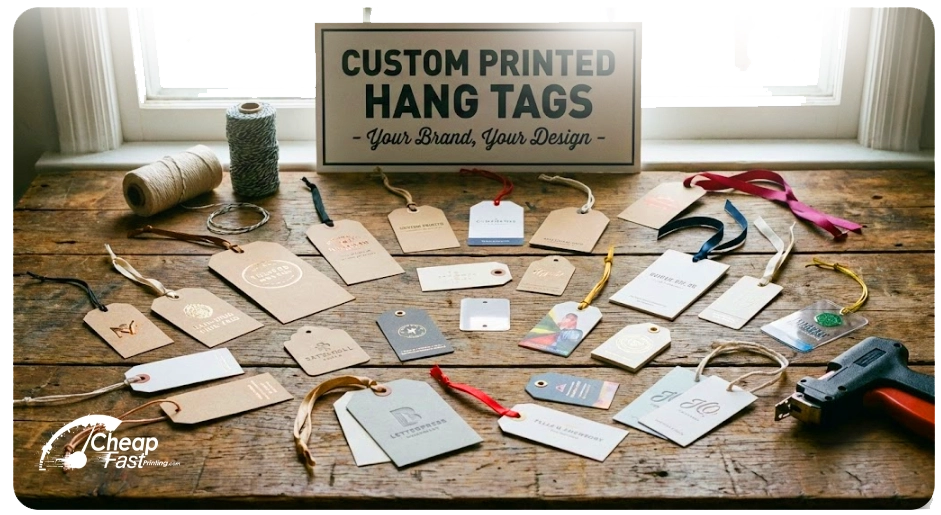
Planning on buying some custom printed hang tags? our product page can help you with this too: https://cheapfastprinting.com/system/printing/hang-tags/
Download all possible hang tag size pre-designed templates on this link: Click Here
But here’s the challenge: with dozens of hang tag dimensions available, how do you choose the right size for your product? Pick too small, and your message gets lost. Go too large, and you overwhelm the product itself.
In this comprehensive guide, we’ll walk you through everything you need to know about hang tag dimensions, from the industry-standard 2″ x 3.5″ to specialty sizes like the bookmark-style 2″ x 8″. Whether you’re launching a clothing line, selling handmade candles, or packaging artisan products, you’ll learn exactly which dimensions work best for your needs.
Why Hang Tag Dimensions Matter More Than You Think

Before we dive into specific sizes, let’s talk about why dimensions are so critical. A hang tag serves as your “silent salesperson”, it’s working for you even when you’re not there. The size you choose communicates just as much as the words printed on it.
A tiny 2″ x 2″ tag on a luxury handbag might look cheap and out of place. But that same size on a piece of handmade jewelry? Perfect. It’s all about proportion and purpose.
The right dimensions also affect:
Cost efficiency: Larger tags cost more to print, are you maximizing value?
- Readability: Can customers easily read your price and care instructions?
- Design space: Do you have room for your logo, QR code, and brand message?
- Attachment method: Will it hang properly from your product without looking awkward?
Standard Hang Tag Sizes: The Complete Chart
Let’s start with the most common dimensions you’ll encounter. At CheapFASTprinting, we offer 24 different sizes to cover virtually every application. Here’s how they break down:
The Minimalist: 2″ x 2″
Actual file size with bleed: 2.25″ x 2.25″
Safe print area: 1.75″ x 1.75″
This square format is your go-to for small items where a larger tag would overwhelm the product. Think jewelry tags, size markers that attach to a main hang tag (S/M/L/XL), or simple “Thank You” tags tied to gift bags.
Design tip: Keep your text to 2-3 lines maximum. This size works best for simple information, a logo, a price, or a short message. If you need to include care instructions or detailed product information, you’ll want something larger.
Real-world example: Etsy sellers love this size for handmade jewelry. It’s small enough to feel delicate but large enough to include a brand name and price.
The Classic: 2″ x 3.5″ (US Standard)
Here it is, the most popular hang tag size in America, accounting for about 60% of all hang tags printed. Why? Because it’s the exact same dimensions as a standard business card, which means customers are already familiar with it.
Why it’s called the standard:
- Retailers have been using it for decades
- It perfectly balances information space with compact size
- Most economical to produce due to high volume
- Fits comfortably in hand without feeling flimsy
Perfect for: General retail clothing, boutiques, price tags, basic product information, anything where you need logo + price + barcode without extra fluff.
Paper recommendation: The 14pt Gloss Cover with High Gloss UV coating is our most popular pairing with this size. The UV coating makes colors pop and protects against moisture and scratches, essential for retail environments where tags get handled constantly.
Design sweet spot: You can comfortably fit a logo at the top (roughly 1.5″ wide), your price in the center (large, readable font), and a barcode or QR code at the bottom. It’s the Goldilocks of hang tags, not too big, not too small, just right.
The Slim Extended: 2″ x 4″ to 2″ x 5″
When you need more vertical real estate but want to keep the width compact, these slim extended sizes are ideal. The extra height gives you room for creativity without making the tag feel bulky.
Popular variations:
- 2″ x 4″ – The t-shirt standard. Enough room for logo, price, and a small care icon.
- 2″ x 4.5″ – Perfect for hoodies and sweatshirts where you want to add “Made in USA” or fabric content.
- 2″ x 5″ – Jacket-length tags with space for detailed care instructions or a brief brand story.
Design advantage: The vertical format lets you separate information into clear sections. Put your logo at the top, pricing in the middle, and care instructions or a QR code at the bottom. The eye naturally travels down, making it easy for customers to find what they’re looking for.
Attachment strategy: These sizes work beautifully when attached to the side seam of garments. They hang straight and don’t twist as much as wider tags.
The Bookmark Tags: 2″ x 6″ to 2″ x 8″
Now we’re getting into specialty territory. These long, slender tags aren’t just functional, they make a statement. We’ve seen customers ordering these as actual bookmarks that double as hang tags, and the crossover makes perfect sense.
Common applications:
Denim jeans (2″ x 6″): Attach it to the back belt loop and let it hang down. It’s visible from across the room and gives customers something to grab and read while browsing.
Wine bottles (2″ x 7″ to 2″ x 8″): Hanging from the neck of the bottle, these long tags create an elegant presentation. You have room for tasting notes, pairing suggestions, vineyard story, and even a small map showing where the grapes were grown.
Premium packaging: Luxury brands use these longer formats to tell their brand story. Each section of the tag can cover a different aspect, origin, craftsmanship, care instructions, and warranty information.
Design warning: With great length comes great responsibility. Text should flow vertically in natural reading order. Avoid making customers turn the tag sideways to read, it’s awkward and reduces readability. Use the length to create a visual journey down the tag.
The Modern Square: 2.5″ x 2.5″ and 3″ x 3″
Square hang tags are having a moment, especially among Instagram-friendly brands. There’s something contemporary and eye-catching about a perfect square that standard rectangles can’t quite achieve.
3″ x 3″ specifications:
- File size with bleed: 3.25″ x 3.25″
- Safe zone: 2.75″ x 2.75″
- Print area: 9 square inches (nearly 3x larger than the standard 2″ x 3.5″)
Perfect for:
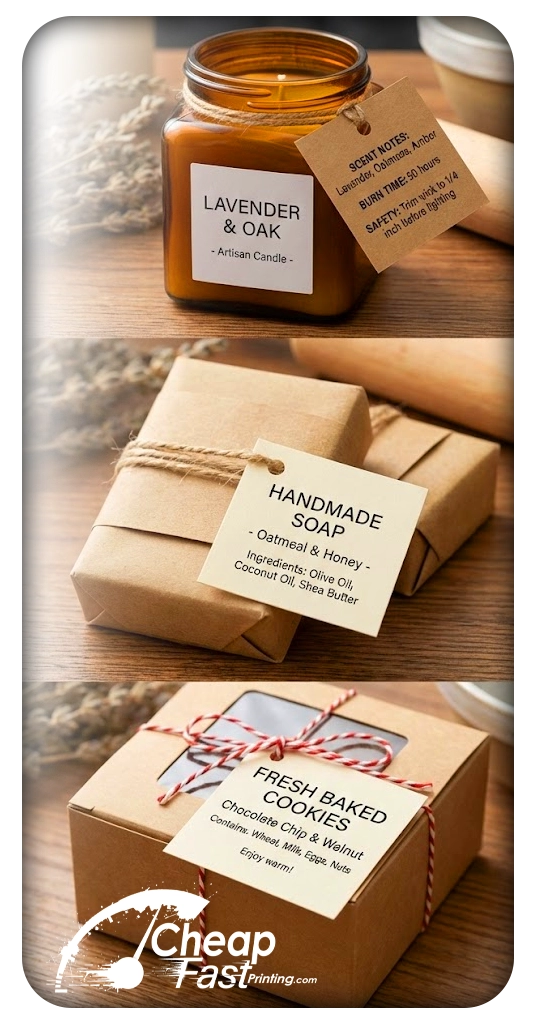
Artisan candles: The square format fits beautifully on top of square or round candle boxes. You have plenty of room for scent descriptions, burn time, and safety warnings without cramping the design.
Soap packaging: Natural soap makers love the 2.5″ x 2.5″ size. Wrap it around the soap bar with a kraft paper belly band, and you’ve got rustic, Instagram-worthy packaging.
Bakery items: Tie a 3″ x 3″ tag to a pastry box with baker’s twine, and suddenly a simple dessert feels like a gift. There’s room for ingredient lists, allergen warnings, and even a recipe suggestion.
Products with square branding: If your logo is square or your overall brand aesthetic leans geometric, these dimensions create visual harmony with your other marketing materials.
The Drill Hole: Small Detail, Big Impact
Every hang tag we print includes an optional 1/8″ (0.125 inch) drill hole. This might seem like a minor detail, but hole placement can make or break your design.
Standard Hole Specifications
Diameter: 1/8″ (0.125 inches) , This is the industry standard size that’s been used for decades. Why? Because it’s the perfect balance between durability and versatility.
Position options:
- Top Center: Traditional, balanced look. Best for tags that will hang straight down.
- Top Left: Creates a slight angle when hung. Works well for tags with right-aligned text.
- Top Right: Mirror of top left. Good for tags with left-aligned design elements.
Distance from edge: We automatically place the hole 0.25″ to 0.375″ from the top edge, which provides enough paper to prevent tearing while keeping the hole close enough to the edge that your attachment string doesn’t take up valuable design space.
What Fits Through a 1/8″ Hole?
You’d be surprised how versatile this size is:
- Standard plastic fasteners (Swiftach guns)
- Safety pins in gold, silver, or black
- Wax cord up to 3mm diameter
- Hemp twine (popular with eco-brands)
- Thin satin ribbon (3mm maximum)
- Elastic loops
- Leather cord for rustic products
Critical design tip: Download our free pre-designed templates before you create your artwork. The templates show exactly where the drill hole will be positioned, so you can design around it. Nothing’s worse than spending hours on a logo only to realize it’s going to have a hole punched right through the middle of it.
How Paper Stock Affects Size Perception
Here’s something most people don’t consider: the same dimensional size can feel completely different based on the paper thickness you choose. A 2″ x 3.5″ tag on 14pt paper versus 18pt paper? They’re technically the same size, but the customer experience is totally different.
Paper Thickness & Feel Guide
14pt Gloss Cover (Standard)
- Thickness: 0.014 inches
- Feel: Sturdy, professional, glossy
- Best size pairing: 2″ x 3.5″, 2″ x 4″
- Used by: 60% of our customers, it’s the workhorse of hang tags
The 14pt Gloss Cover is what most retailers use. Customers are already accustomed to seeing this thick, sturdy, high-gloss UV hang tag on popular products. The UV protection makes colors deeper and protects against moisture and scratches, ideal for clothing that gets tried on frequently.
16pt Premium Matte Cover (Sophisticated)
- Thickness: 0.016 inches (12% thicker than standard)
- Feel: Velvety, silky, sophisticated
- Best size pairing: 2″ x 3.5″ to 2″ x 5″ for high-end products
- Used by: Luxury boutiques, jewelry designers, premium brands
The matte finish has a unique ‘dull’ sophistication that photographs beautifully. In this case, dull means elegant, it has a soft, smooth texture that feels expensive to the touch. This is the top choice for brands positioning themselves as luxury or premium.
Important note: Matte finish reduces glare, making QR codes easier to scan. If you’re including a QR code for customers to access your Instagram or product videos, matte is your friend.
18pt Premium Kraft (The Naturalist)
- Thickness: 0.018 inches (28% thicker than standard)
- Feel: Rustic, eco-friendly, textured
- Color: Natural dark brown with visible recycled fibers
- Best size pairing: 2″ x 2″ to 2″ x 4″ for artisan/eco products
Made from 100% recycled fibers, this paper makes an environmental statement before customers even read the text. The natural raw flake texture immediately signals “eco-conscious,” “handmade,” or “sustainable.” Adventure brands, outdoor companies, and eco-friendly products love this stock.
Design consideration: There’s no white ink available for kraft paper, so your designs need to work with the brown base color. High-contrast colors (black, navy, forest green) work beautifully. Avoid light pastels that will get lost against the brown background.
18pt Ultra-Premium Pearl (The Showstopper)
- Thickness: 0.018 inches
- Feel: Shimmering, luxurious, premium
- Special feature: Subtle pearl/iridescent finish
- Best size pairing: 2.5″ x 2.5″, 3″ x 3″ for weddings and luxury items
This is the red carpet of hang tag papers. The subtle shimmer catches light beautifully, perfect for bridal shops, wedding favors, high-end cosmetics, or any product where presentation is everything. It photographs incredibly well, which is why Instagram-focused brands gravitate toward it.
Size + Paper Strategy
The right combination matters:
- ❌ Small tag (2″ x 2″) on thin stock = feels cheap and disposable
- ✅ Small tag (2″ x 2″) on 18pt Kraft = premium artisan feel
- ✅ Large tag (3″ x 3″) on 16pt Matte = luxury statement piece
- ❌ Large tag (2″ x 8″) on lightweight stock = flimsy, bends easily
General rule: The larger your tag, the thicker your paper stock should be. A 2″ x 8″ bookmark tag needs the structural support of 16pt or 18pt paper to hang properly without curling or flopping.
Folded Hang Tags: When You Need Double the Space
Sometimes a single-sided tag just isn’t enough. You need room for care instructions, a brand manifesto, return policy information, and maybe even a coupon for the next purchase. That’s where folded hang tags come in.
How Folded Tags Work
We print your design on a larger piece of cardstock, then score it down the middle. The tag ships to you flat, and you fold it yourself along the score line. This gives you four printable surfaces:
- Outside front
- Outside back
- Inside left panel
- Inside right panel
Popular Folded Dimensions
2″ x 4″ → folds to 2″ x 2″ This is the most common folded configuration. When closed, it’s a compact 2″ x 2″ square. When opened, you’ve got 8 square inches of total print area spread across four panels.
Use cases:
- Panel 1 (front): Your logo and product name
- Panel 2 (back): Price and barcode
- Panel 3 (inside left): Care instructions with washing symbols
- Panel 4 (inside right): Brand story or “bring this back for 10% off” coupon
2″ x 6″ → folds to 2″ x 3″ The catalog-style fold. Offers more vertical space for detailed information. Popular with technical products that need specification sheets or garments requiring detailed care instructions.
3″ x 3″ → folds to 1.5″ x 3″ The gift tag fold. When closed, it’s a narrow 1.5″ x 3″ rectangle. The outside can say “To/From:” and the inside can include your brand message or a thank-you note.
Important Notes About Folded Tags
⚠️ Not available for instant online ordering. Folded tags require custom setup and scoring. Contact us directly if you need folded hang tags, and we’ll provide a custom quote based on your specifications.
Scoring precision: The score line (the crease where the tag folds) is placed exactly at the midpoint. This ensures a clean, professional fold every time. The tags are scored but not folded, you receive them flat and fold them yourself.
Paper recommendations for folding:
- ✅ 14pt stocks fold cleanly
- ✅ 16pt Premium Matte folds well with a crisp edge
- ⚠️ 18pt stocks are very thick and require more pressure to fold (but create a premium feel)
Industry-Specific Size Recommendations
Let’s get practical. Here’s exactly what sizes work best for different industries, based on thousands of customer orders.
Fashion & Apparel
Streetwear brands: 2″ x 3.5″ on 14pt Gloss with vibrant full-color printing. Often feature bold graphics, pricing, and social media handles.
Luxury boutiques: 2″ x 4″ or 2″ x 5″ on 16pt Premium Matte. Elegant, understated, with plenty of white space. Sometimes feature embossed logos or foil stamping for extra sophistication.
Sustainable/eco-friendly fashion: 2″ x 3″ to 2″ x 4″ on 18pt Kraft. The recycled paper immediately communicates environmental values. Often include “Care for this planet” messaging alongside care instructions.
Bridal and formal wear: 3″ x 3″ or 2″ x 5″ on 18pt Pearl. These tags are keepsakes, brides often save them as mementos. The larger size and premium paper justify the higher price point.
Fast fashion / budget retail: 2″ x 3.5″ on 14pt Gloss, no frills. Focus is on price visibility and clear sizing information.
Home Goods & Candles
Artisan candles: 2″ x 4″ folded format on Kraft paper. Outside: Product name and scent. Inside: Burn time, safety warnings, care instructions, and company story.
Bath products (soaps, bath bombs): 2″ x 2″ to 2″ x 2.5″ on Kraft or Matte. Often wrapped around the product with a belly band, creating a rustic presentation.
Furniture showroom: 2″ x 5″ on 14pt Gloss. Needs room for specifications: dimensions, materials, care instructions, SKU numbers, and pricing.
Food & Beverage
Wine bottles: 2″ x 6″ to 2″ x 8″ on 16pt Matte (to avoid glare from wine shop lighting). Hangs elegantly from bottle neck. Include: varietal, tasting notes, food pairing suggestions, vineyard location.
Mason jar products (jams, honey, sauces): 2″ x 2.5″ to 2″ x 3″ on Kraft with hemp twine. The rustic look matches the farmhouse aesthetic. Include: ingredients, “Best by” date space (writable surface), simple branding.
Specialty coffee: 2″ x 3.5″ on 14pt Uncoated (so staff can hand-write roast dates). Include: Origin, roast level, tasting notes, brewing recommendations.
Bakery boxes: 2.5″ x 2.5″ or 3″ x 3″ on Pearl or Matte. Tied with ribbon to bakery twine. Include: Item name, ingredients, allergen warnings, baker’s mark or signature.
Jewelry & Handmade Goods
Earrings: 2″ x 2″ on 16pt Matte. The tag itself becomes the backing card. Punch holes for the earring posts, and your tag becomes functional packaging.
Necklaces and bracelets: 2″ x 2.5″ on Pearl. Small enough not to overwhelm delicate jewelry, large enough for metal content (14k, sterling) and care instructions.
Handmade crafts (Etsy sellers): 2″ x 2″ to 2″ x 3″ on Kraft. Include: “Handmade by [Name],” care instructions, social media handle, “Thank you for supporting small business” message.
Technical Design Specifications: Getting It Right
You’ve chosen your size. Now let’s make sure your design files are set up correctly so your tags print perfectly.
Bleed & Safe Zone Requirements
Bleed: 0.125″ (1/8″) on all sides
This is extra space beyond the trim line where your background colors and images should extend. Why? Because cutting 1,000 tags with perfect precision is impossible, there’s always slight variation. The bleed ensures that even if the cut is off by a hair, you won’t see white edges.
Example: If you’re ordering 2″ x 3.5″ tags, your design file should be:
- Trim size: 2″ x 3.5″ (final tag size)
- File size with bleed: 2.25″ x 3.75″ (adds 0.125″ on each edge)
Safe zone: Keep all important elements (text, logos, pricing) at least 0.125″ away from the trim edge.
Why? Because that same cutting variance that requires bleed might also clip elements that are too close to the edge. Text should definitely be in the safe zone, or it might get partially cut off.
Visual guide: Our free downloadable templates show both the bleed line (red) and safe zone (blue), so you can design with confidence.
Resolution & Color Mode
Resolution: 350 DPI recommended, 300 DPI minimum
DPI stands for “dots per inch”, the higher the number, the sharper your print. Anything below 300 DPI will look pixelated and blurry when printed.
How to check your resolution:
- Open your image in Photoshop or any design software
- Go to Image > Image Size
- Make sure the resolution is set to at least 300 DPI
- Physical dimensions should match your tag size + bleed
Color Mode: CMYK (not RGB)
This is where many first-time customers make mistakes. Your computer screen displays colors using RGB (Red, Green, Blue light). But printers use CMYK (Cyan, Magenta, Yellow, Black ink). Some RGB colors, especially bright neons, simply can’t be reproduced in CMYK ink.
What this means:
- Design in CMYK mode from the start if possible
- If you submit RGB files, we’ll convert them automatically
- Colors may shift slightly during conversion (especially bright blues and greens)
- To avoid surprises, request a PDF proof before we print
Pro tip: If color accuracy is critical (like matching a brand’s specific Pantone color), consider ordering a printed proof or sample kit before committing to a large quantity.
File Format Preferences
1. PDF (Preferred)
Why we love PDFs: Fonts are embedded, layers are flattened, and what you see is what we print. No surprises with missing fonts or shifted elements.
How to export a print-ready PDF:
- Include bleed (0.125″)
- Embed all fonts
- Use CMYK color mode
- Save as high-quality print PDF
- Don’t compress images below 300 DPI
2. High-Resolution JPG (CMYK)
Simple and universal. Make sure it’s CMYK color mode and at least 300 DPI at the actual print size.
3. AI, PSD, TIFF
We accept these, but there’s more room for interpretation. Make sure all fonts are outlined (converted to shapes) and layers are properly organized.
Common Design Mistakes (And How to Avoid Them)
❌ Text too close to edges
Fix: Keep all text at least 0.125″ from the trim line. Use our templates with safe zone guides.
❌ Logo positioned where hole will be punched
Fix: Download our templates showing exact hole placement. Design around it.
❌ Using RGB neon colors
Fix: Design in CMYK from the start. That electric blue you love won’t print as vibrantly in ink.
❌ Low-resolution images (pulled from websites)
Fix: Use original high-res images. Web images are typically 72 DPI, too low for print.
❌ Forgetting to include bleed
Fix: Set up your document correctly from the beginning. A 2″ x 3.5″ tag needs a 2.25″ x 3.75″ file size.
✅ The solution to all of these: Download our free pre-designed templates for your specific size. They have bleed lines, safe zones, drill hole placement, and correct CMYK color settings already built in.
The Ultimate Size Selection Guide: A Decision Framework
Still not sure which size to choose? Follow this decision tree:
Step 1: What’s your product size?
Small items (jewelry, accessories, keychains, small gift items)
→ Choose: 2″ x 2″ or 2″ x 2.5″
Medium items (shirts, small boxes, candles, soap bars)
→ Choose: 2″ x 3.5″ or 2″ x 4″
Large items (jeans, jackets, wine bottles, gift baskets)
→ Choose: 2″ x 6″ to 2″ x 8″
Step 2: How much information needs to fit?
Minimal (just price + logo)
→ Choose: 2″ x 2″ to 2″ x 3.5″
Moderate (price + brand story + care icon)
→ Choose: 2″ x 4″ to 2″ x 5″
Extensive (care instructions + story + warranty + coupon)
→ Choose: Folded 2″ x 4″ or bookmark size 2″ x 6″+
Step 3: What’s your brand positioning?
Budget-friendly / high volume
→ Choose: 2″ x 3.5″ on 14pt Gloss (most economical)
Mid-range / quality-focused
→ Choose: 2″ x 4″ on 16pt Matte (premium feel without luxury pricing)
Luxury / premium positioning
→ Choose: 3″ x 3″ or 2″ x 5″ on 18pt Pearl or Matte (makes a statement)
Eco-conscious / artisan
→ Choose: 2″ x 3″ to 2″ x 4″ on 18pt Kraft (immediately signals sustainability)
Step 4: What attachment method will you use?
Plastic fasteners (Swiftach gun)
→ Any size works, but 2″ x 3.5″ to 2″ x 4″ are most common
Safety pins
→ 2″ x 2″ to 2″ x 4″ (easier to attach, won’t bend the tag)
Ribbon or twine (tied by hand)
→ 2″ x 6″ to 2″ x 8″ (elegant hang, makes the ribbon part of the presentation)
Wrapped around product (like soap belly bands)
→ 2″ x 2″ to 2″ x 2.5″ (compact, wraps neatly)
Real Customer Success Stories
Let’s look at how real businesses solved their hang tag challenges with the right dimensions.
Case Study 1: Boutique Clothing Line Goes Premium
The Challenge: Sarah’s boutique was using 2″ x 3.5″ glossy tags, but customers kept comparing her products to fast-fashion brands based on the “generic” looking tags.
The Solution: Switched to 2″ x 4″ on 16pt Premium Matte with a minimalist design, lots of white space, subtle logo, elegant typography.
The Result: Customers immediately perceived the clothing as higher quality. The velvety tag texture became a talking point. Sarah was able to justify a 15% price increase, and sales actually improved because the tags signaled “luxury boutique” instead of “mall store.”
Key takeaway: Size + paper stock work together. The extra half-inch of height plus premium matte paper completely changed brand perception.
Case Study 2: Candle Maker Solves Safety Compliance
The Challenge: Mike makes artisan candles and was using 2″ x 2″ tags. Problem: No room for required safety warnings, burn time, and care instructions. He was considering printing this info on the jar label, but that would increase costs significantly.
The Solution: Switched to 2″ x 4″ folded tags on Kraft paper. Outside panels: Product name, scent, pricing. Inside panels: Detailed burn instructions, safety warnings, “About Our Soy Wax” story.
The Result: Met all legal requirements without changing jar labels. Bonus: Customers loved opening the tag to read the brand story, it added an element of discovery to the unboxing experience. Comments on social media increased by 40% because the folded tags were “Instagram-worthy.”
Key takeaway: Folded tags solve the information density problem while adding a premium feel.
Case Study 3: Denim Brand Creates Marketing Tool
The Challenge: James’s denim company needed tags, but he wanted them to double as marketing since his products were expensive ($200+ jeans).
The Solution: 2″ x 8″ bookmark-style tags attached to the back belt loop. The long format allowed for: Brand logo at top, QR code linking to “How We Make Our Jeans” video, care instructions, sustainability story, lifetime repair policy details.
The Result: The tags became conversation starters in-store. Multiple customers posted photos of the tags on Instagram because they “looked cool hanging from the jeans.” The QR code got 3x more scans than James’s previous business card QR codes because the tag was large and impossible to ignore.
Key takeaway: The right size turns a functional tag into a marketing asset.
Ready to Order Your Perfect Hang Tags?
You now know more about hang tag dimensions than 99% of business owners. You understand why the 2″ x 3.5″ is the industry standard, when to use bookmark-style 2″ x 8″ tags, and how paper thickness affects customer perception.
Here’s what happens next:
Step 1: Choose Your Dimensions
Based on everything you’ve learned, pick the size that matches your product and brand positioning.
Still unsure? Order our FREE sample kit, which includes 3-5 different sizes and paper stocks so you can feel the difference before committing to a large order.
Step 2: Download Free Templates
Grab the pre-designed template for your chosen size from our website. These templates include:
- Exact bleed lines (0.125″ on all sides)
- Safe zone guides (keep text here)
- Drill hole placement (all three position options marked)
- Correct CMYK color settings
- Available in JPG, PSD, and AI formats
Step 3: Design (Or Let Us Help)
Design your hang tags yourself using the templates, OR take advantage of our FREE design services:
- Free design setup (we’ll create a design from scratch)
- Free logo setup (send us your logo, we’ll format it correctly)
- Free QR code generation (we’ll create one linked to your site)
- Free design edits (need tweaks? We’ll help)
Step 4: Place Your Order
Head to cheapfastprinting.com/system/printing/hang-tags/ and configure your order:
- Select your size
- Choose your paper stock (14pt, 16pt, or 18pt)
- Pick your quantity (100 to 100,000+)
- Add finishing options (UV coating, rounded corners)
- Select drill hole position
- Upload your artwork
Popular Starting Packages
The Starter (Perfect for testing)
100 qty of 2″ x 3.5″ on 14pt Gloss
Ideal for: New businesses, product launches, market testing
The Small Business Standard
500 qty of 2″ x 4″ on 16pt Matte
Ideal for: Boutiques, Etsy sellers, small retail operations
The Volume Play (Best value per tag)
2,500 qty of 2″ x 3.5″ on 14pt Gloss
Ideal for: Established brands, wholesale, maximum cost efficiency
What’s Included With Every Order
✅ Free design setup – Professional design assistance at no charge
✅ Free drill hole placement – Precision 1/8″ hole in your chosen position
✅ Free downloadable templates – Design with confidence
✅ 3-5 day standard turnaround – Fast production
✅ Free online proofing – Approve your design before printing
✅ Premium lithography printing – Same technology used by major fashion houses
Have Questions? We’re Here to Help
Not sure which size or paper stock is right for your product? Contact our design team for personalized recommendations. We’ve helped thousands of businesses choose the perfect hang tag dimensions, and we’re happy to guide you through the process.
Get started today: Visit cheapfastprinting.com/system/printing/hang-tags/ to configure your custom hang tags and see real-time pricing.
Your products deserve hang tags that make them look as good as they are. The right dimensions are the first step toward creating that premium presentation that turns browsers into buyers.