Event marketing is different. A flyer is not just information; it is a short-lived “attention contract” between your venue and a passerby. In two seconds, someone decides whether your event matters to them. If your flyer wins that moment, your QR code and call-to-action turn ink into action. If it loses, your flyer becomes trash before your budget is even processed.
The goal of this guide is to help you print event flyers that feel premium, read instantly, and perform measurably. We will cover the full pipeline: choosing the right flyer size, configuring bleed and safe zones, designing with a conversion-first hierarchy, and distributing to real locations where attendees already are. We will also show you how to model your cost per registration and plan the safest order timeline so you do not end up with last-minute rush fees.
If you remember only one thing, make it this: clarity + proximity + timing. Clarity is what people read in passing. Proximity is whether you placed the flyer where your audience already hangs out. Timing is whether your flyer landed early enough to convert into RSVP or ticket purchase.
- Define the Event Goal (RSVP, Tickets, Registrations)
- Match the Flyer to the Event Type
- Design for Fast Attention (Not Slow Reading)
- Choose Flyer Size + Paper That Fits the Venue
- Interactive: Event Flyer Budget + ROI Planner
- Interactive: Event Timeline Planner
- Where to Distribute Event Flyers (High Intent Zones)
- Browse 6 Event-Optimized Flyer Formats
- Top 10 Event Flyer Printing FAQs
Define the Event Goal (RSVP, Tickets, Registrations)
Before you print, decide what “success” means. A common mistake is treating every event like a generic announcement. Your flyer should behave differently depending on the outcome:
- RSVP events: prioritize date/day, start/end time, venue address, and a single confirmation CTA (QR + short URL).
- Paid ticketed events: emphasize the hook (headline promise), show a price or “limited seats” cue if you have it, and make the action path obvious.
- Registration-driven workshops: highlight the benefit (what they learn), include the target audience, and reduce friction with QR-to-form.
- Community campaigns: use credibility cues (organizer name, partner logos) and a clear “who this is for” line.
When the goal is clear, your design hierarchy gets simpler. Instead of cramming everything into one rectangle, you choose a primary path and build everything around it. That is how you avoid the “pretty but ineffective” flyer problem.
Match the Flyer to the Event Type
Not all events produce the same reader behavior. A concert flyer is often scanned while people are moving. A church event flyer may be read while someone waits or sorts mail. A school PTA flyer is frequently shared by adults with decision authority. Your flyer design and distribution plan should adapt to those behaviors.
Concerts, parties, and nightlife
For nightlife and entertainment, speed matters. Your audience is in motion and your flyer competes with social distractions. A compact size like 4×6 or 4.25×5.5 works well because it supports a bold headline and a single CTA. If you have strong photography, gloss paper helps colors pop under venue lights and daylight.
Sports, leagues, and tournaments
Sports event flyers are often saved for later or shared with family. Use a layout that keeps date/day and location extremely visible, then add 2-4 details that help people decide: “all ages,” “free entry,” “schedule starts at,” or “what to bring.” Rack-style display formats can outperform because they remain visible across a multi-day venue period.
Community workshops and nonprofit sessions
For community events, people care about who benefits and why they should attend. Use short benefit phrasing and include one trust cue such as “run by,” “sponsored by,” or “hosted with.” A matte finish can help reduce glare, especially if flyers are placed outdoors or in bright lobbies.
Seasonal pop-ups and local markets
Seasonal events are often repeated or share overlapping audiences. Print a “core template” flyer and then customize only the essentials: date, location, and offer. That keeps branding consistent while still giving each flyer batch a unique QR code so you can track which market locations perform best.
Design for Fast Attention (Not Slow Reading)
Your flyer is not competing with other print ads. It is competing with walking speed, time pressure, phone scrolling, and curiosity. The best event flyer designs behave like a landing page you can read while holding a flyer in one hand.
The 5-element hierarchy (use this every time)
- Headline promise: what is the event and why should they care?
- Date/day + time window: put this where the eye lands first.
- Location: include full address or “near X” landmark.
- Single CTA: “Scan for tickets,” “RSVP now,” “Get the schedule,” etc.
- QR code (with contrast): large enough to scan in one try.
Make the QR code earn its space
A QR code is only valuable if it leads to a fast, mobile-friendly action. Use a campaign-specific landing URL and make sure the landing page loads quickly on cellular data. For high-intent placement, you can also include a text fallback like “Text EVENT to 555-1234” so people who cannot scan still convert.
Typography that survives real-world lighting
Outdoor light, venue shadows, and fluorescent interiors change how colors and contrast appear. If you use a dark background, choose text color contrast that remains readable. Avoid placing essential text over busy image backgrounds. If you need an image overlay, use a subtle semi-transparent panel behind the event essentials.
Bleed and safe zone: the production rule that protects your design
Even the best design fails if it clips at the edges. Use full bleed so background colors and graphics reach the trim line, and keep all critical content at least 0.125 inch inside the final trim edge. This 0.125-inch safe zone rule protects logos, QR codes, and event details from being cut off during finishing.
Keep the QR code away from the edges and near the CTA text. In real distribution, flyers get bent, stacked, and re-stacked. If the QR code is placed too close to the trim, scanning quality drops as soon as a corner gets damaged.

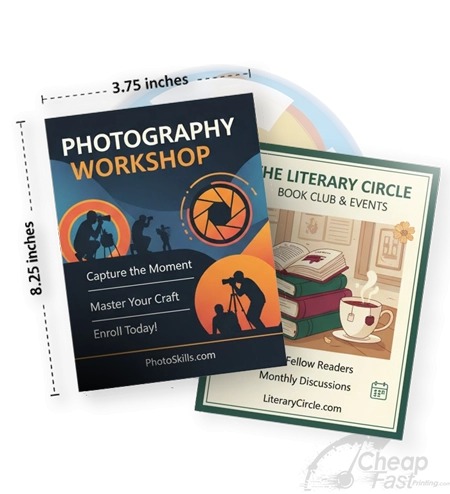
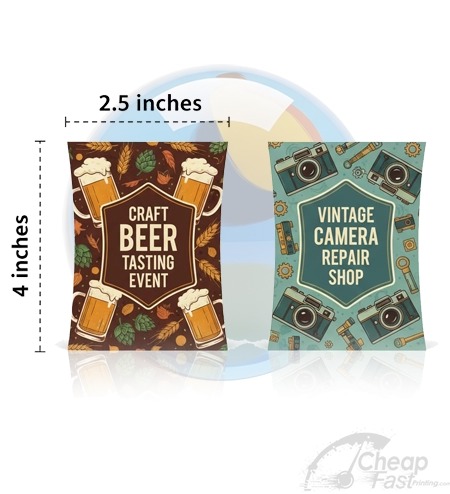
Choose Flyer Size + Paper That Fits the Venue
The “right” flyer size is the one that matches the physical moment. Events create short moments: a handout at a line, a flyer pinned by a notice board, a rack card displayed at a front desk, or a door drop delivered earlier before the audience is ready.
Common event flyer size guidance
| Size | Best For | Why It Works |
|---|---|---|
| 4×6 | Street handouts | Portable and fast to scan. Great for compact “headline + date + QR” layouts. |
| 4.25×5.5 | High-volume event promos | Economical per unit while still allowing a readable block of event essentials. |
| 5.5×8.5 | Most events | Balanced readability for venue signage, community drops, and multiple bullet details. |
| 8.5×11 | Premium display | More room for schedule blocks, partner logos, and a “what to expect” section. |
| 4×9 rack cards | Front desk visibility | Designed to stand out in racks and countertop displays for multi-day awareness. |
Paper finish: gloss vs matte for event conditions
For photo-heavy flyers (concerts, parties, product demos), gloss often creates the strongest “stop effect” because color saturations and image contrast look more vivid. If your event flyer includes a lot of small text or you expect the flyer to be handled frequently under bright lighting, matte can reduce glare and improve steady readability.
Thick cardstock helps more than you think
Thin flyers feel disposable. Thick stock feels intentional. For events with premium positioning (fundraisers, paid workshops, speaker events), consider a heavier option like 14pt or 16pt cardstock. That small physical change can increase perceived value and lead to higher retention (people keep flyers longer).
Plan for distribution friction
Every distribution channel creates “damage risk”: flyers get bent, pinned at an angle, taped on surfaces, or placed where they catch moisture. Choose paper that tolerates your distribution reality. If you distribute outdoors, protect your flyer with a finish that resists smudging and fading.
Interactive: Event Flyer Budget + ROI Planner
Use this quick model to estimate cost per RSVP/ticket click. This is not a “perfect prediction,” but it helps you choose the right size, quantity, and campaign clarity before you place a large order.
Interactive: Event Timeline Planner
Printing is only one part of event success. The other part is making sure your flyers arrive and are distributed before your audience is ready to act. Use the planner below to generate a safe ordering and distribution window.
Where to Distribute Event Flyers (High Intent Zones)
Distribution is where most event flyers either win or lose. Your design might be excellent, but if you place it where your audience is unlikely to see it at the right time, your conversion will be poor.
High-intent physical zones
- Venue-adjacent locations: cafes, restaurants, and shops within walking distance from your event space.
- Community hubs: libraries, community centers, and bulletin boards where people are already in “local info” mode.
- Sports + wellness networks: gyms, martial arts studios, run clubs, and training spaces for active audiences.
- High-footfall service businesses: salons, barbers, repair shops, and tutoring centers that get repeated visits.
- Partner businesses: non-competing local partners who agree to include one of your flyers with a related offer.
Timing rules by distribution type
- Handouts at the venue: distribute immediately before the event start and also at the end of the event to capture “what’s next.”
- Door drops: drop in advance so people have time to plan (and do not discover your event while it is already happening).
- Display racks: place 1-2 days early and maintain your display so it does not vanish mid-week.
- Mail/EDDM-style: plan around delivery speed, and do not assume people see mail the same day it arrives.
Where retail chains fit (and where they do not)
If you are trying to print flyers quickly, it is normal to look at big retail options like print flyers at staples, print flyers at office depot, print flyers at walmart, and print flyers at walgreens. Those can work for last-minute emergency runs. However, for premium event outcomes (strong color pop, accurate full bleed, and heavier paper feel), many organizers prefer online production so they can order flyers print bulk with consistent quality.
For event deadlines, you may also consider services like print flyers at fedex, print flyers at cvs, or similar local providers. The key question is not “can they print quickly?” but “can they deliver consistent specs?” Ask about 300 DPI readiness, CMYK handling, and full bleed coverage. If a chain only offers basic light-weight stocks or struggles with bleed accuracy, your event flyer may look washed out or incorrectly trimmed.
And if you are printing in-house, remember that print flyers at home has limitations: ink coverage, paper consistency, and the realism of the final finish. DIY can work for small quantities, but for event-scale distribution, professional print helps your flyer feel credible, not like a photocopy.
When you combine a premium design with a plan for where your flyers go, your event flyer becomes a measurable performance asset—not a “hope it works” expense.
Browse 6 Event-Optimized Flyer Formats
These are product formats mapped to this post. Use the cards below to pick a physical flyer type that matches your event’s distribution reality (handout, door drop, or display).