Printing flyers at home can be the fastest way to respond to real-world deadlines: a last-minute event, a new promotion, or a small batch for local partners. The trade-off is that home printers vary widely in paper handling, color behavior, and consistency.
This guide focuses on what matters most for flyer quality at home: printer capability (resolution and ink/toner behavior), paper selection, bleed-safe output, and predictable costs. Use the two widgets to choose a machine approach and estimate consumables costs before you print a full run.
For home flyers, the KPI is not “maximum print quality.” The KPI is: can you read the headline + CTA and scan the QR reliably after trimming and drying.
- Machine Types: Inkjet vs Color Laser vs Specialty
- Paper Handling: The Quality Multiplier
- File Setup for Home Flyer Printing
- Interactive: Machine Match Finder
- Interactive: Consumables Cost Estimator
- Test Print Strategy (avoid wasting a full run)
- Browse 6 Format Example Picks
- Top 10 Home Flyer Printing FAQs
Machine Types: Inkjet vs Color Laser vs Specialty
When you compare machines, do not only compare megapixels or “marketing DPI.” Compare how the machine handles color on your chosen paper and how it behaves under repeated print runs.
Pigment inkjet: the home photo-workhorse
Pigment inkjet printers often produce crisp text and strong photo detail. They are also helpful when your flyers include color gradients and rich images. The downside is that ink needs time to dry, and paper handling can affect smudging if you stack too quickly.
Color laser: consistency for text and solids
Color lasers are often more consistent for text-heavy flyers. They also typically have faster output drying because toner is fused to paper. If your flyer is mostly typography, color blocks, and a QR CTA, laser can be a strong choice.
Specialty/wide printers: when size becomes the problem
Home printing becomes more complicated if you need large sizes or non-standard formats. In that case, you may need a wide-format printer or you may decide to outsource larger display sizes. Either approach can be cost-effective if you match your machine choice to your distribution reality.
Paper Handling: The Quality Multiplier
Paper is where home printing success or failure usually shows up. Thin paper curls. Cheap paper absorbs ink unpredictably. Too-slick paper can cause smearing. The same printer can look fantastic with one paper stock and mediocre with another.
How paper affects flyer readability
- Coated vs uncoated: coated paper often makes color and photos look more vivid.
- Thickness: thicker stock reduces edge curling and makes the flyer feel premium and “kept.”
- Finish: matte reduces glare; gloss increases contrast but can reflect under bright lighting.
Feed path and margins matter
Some home printers struggle with thick stocks and may mis-feed or reduce image coverage. Also, many printers impose margins that prevent true full-bleed. For flyer production, this means you must test with one sheet and confirm that your CTA and QR are not clipped.
File Setup for Home Flyer Printing
Home printing still follows the same principles: sharp files, correct color handling, and safe-zone protection.
- 300 DPI at final size: prevents blurry photo edges and weak QR edge detail.
- Full bleed: set your layout to extend to bleed; then verify your driver settings do not add unwanted margins.
- Safe zone: keep logos, phone numbers, and QR codes at least 0.125 inch inside trim.
- Correct media setting: choose the paper type mode that matches your paper stock (plain, photo, matte, etc.).
Do not rely on screen preview alone. Ink and toner interact with paper texture and coating. Proof with a test sheet so your flyer reads correctly in real lighting.
Home printer specs checklist (what to verify)
Before you print a full flyer run, verify the settings and capabilities that affect readability and QR scanning. Home printers can hide these details in driver menus, so treat this as a checklist and repeat it whenever you change paper stock.
- Quality mode: choose “best” or the highest quality setting. If you only pick “draft,” edges and QR edges can become noisy.
- Media type: match the paper type mode to your stock (plain, matte, photo, coated). The printer changes how ink/toner density is applied.
- Border/margin settings: disable scaling that adds margins when possible. Home drivers may force margins unless you select the correct page setup.
- Color handling: if available, use a printer-managed profile or confirm that your workflow is not doing unintended RGB conversions.
- Duplex support (if needed): flyers with back content need consistent duplex alignment so QR/contact blocks land where you expect.
- Paper feed and thickness support: confirm the maximum supported paper weight for your paper stock so you avoid jams and mis-feeds.
- Stacking behavior: if inkjet, give prints enough time to dry. Smudging ruins CTA contrast and can reduce QR scan reliability.
- Test print reproducibility: print one test sheet twice and confirm it looks the same. If results shift, lock your settings and stop changing driver options.
Paper-thickness testing workflow (fast and reliable)
Paper thickness determines how your flyer feels and how consistently it prints. Use a short workflow:
- Test sheet 1: print your flyer on the chosen stock. Wait for it to fully dry (inkjet) and then check whether text remains crisp.
- Test sheet 2: cut or trim a sample and confirm the safe-zone survives. Check QR readability by scanning with your phone.
- Edge behavior check: look for curl at corners and along edges. If the flyer curls, the reader experience changes and stacking can hide your CTA.
- Repeatability check: print a second sheet after changing nothing. If color shifts, pause and adjust color/profile settings before continuing.
This workflow is how you turn home printing from “guess and hope” into a repeatable production process. Once you pass these checks, you can scale safely without wasting cartridges and paper.
Spec traps to avoid (what matters most)
Marketing specs like “maximum resolution” can be misleading for flyer work. A home printer can claim very high DPI but still produce soft edges on coated stock if the driver smoothing and paper mode are wrong. For flyer quality, focus on driver controls you can actually lock:
- Ability to select the correct paper type (plain vs photo vs matte)
- Reliable border/margin control for near-edge designs
- Consistent color profile behavior across multiple prints
- Feed path support for thicker stocks without jams
- Dry time and smudge resistance so QR/CTA contrast stays clean
- Simple proof/testing workflow that lets you iterate quickly on one sheet
If you are unsure, do a confidence test: print one sheet in monochrome first to confirm trim/margins and QR placement, then print a single color test page to validate contrast. Once those two checks pass, scale to your full run.

Interactive: Machine Match Finder
Answer a few questions and the widget recommends a printer approach (inkjet vs laser vs wide) and the key specs to prioritize.
Interactive: Consumables Cost Estimator
Estimate ink/toner cost for your home run. This model is intentionally simple; it helps you compare “home vs outsource” decisions.
Test Print Strategy (avoid wasting a full run)
No matter which machine you choose, you should do a test print. The reason is simple: home printers have driver-specific margins and paper-specific color behavior. The test print confirms that your flyers survive the real-world constraints of your setup.
What to test on your first sheet
- Trim safety: does the safe zone protect QR and CTA after cutting?
- QR scan reliability: is the QR crisp and high-contrast?
- Dryness: does ink smear when you stack flyers?
- Color expectations: do key brand colors match your intent (at least directionally)?
Use a repeatable workflow
Once your settings are validated, keep them. Changing paper type mode mid-run or switching color settings can shift contrast and make a later batch look “off.” For most home campaigns, the easiest path to consistent flyers is a repeatable test-then-lock workflow.
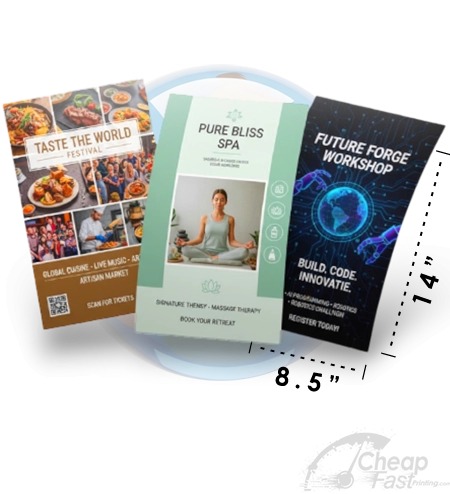
Browse 6 Format Example Picks
These six allocated products are examples for this post. Think of them as “what your home prints should feel like” when you compare stock and finish expectations.