

By Carlos Mendez, Print Production Manager · Updated February 2026 · 11-min read
This page contains the exact USPS dimensions and template specifications for every standard direct mail format — postcards, EDDM flats, letters, and folded mailers. Use the tables below to set up your file in Canva, Adobe Illustrator, InDesign, or any design software. Every measurement is sourced directly from the USPS Business Mail 101 guidelines.
If you have already designed a file and need it checked for compliance, upload it here — our production team reviews every file for USPS spec issues before it goes to press, at no charge.
Table of Contents
Standard Postcard Templates — Sizes and Specs
EDDM Template — Every Door Direct Mail Dimensions
Letter and Folded Mailer Specs
Required Clear Zones on Every Mail Piece
Aspect Ratio Rules and the Non-Machinable Trap
Bleed, Resolution, and Color Mode Requirements
EDDM vs. Standard Direct Mail — Key Differences
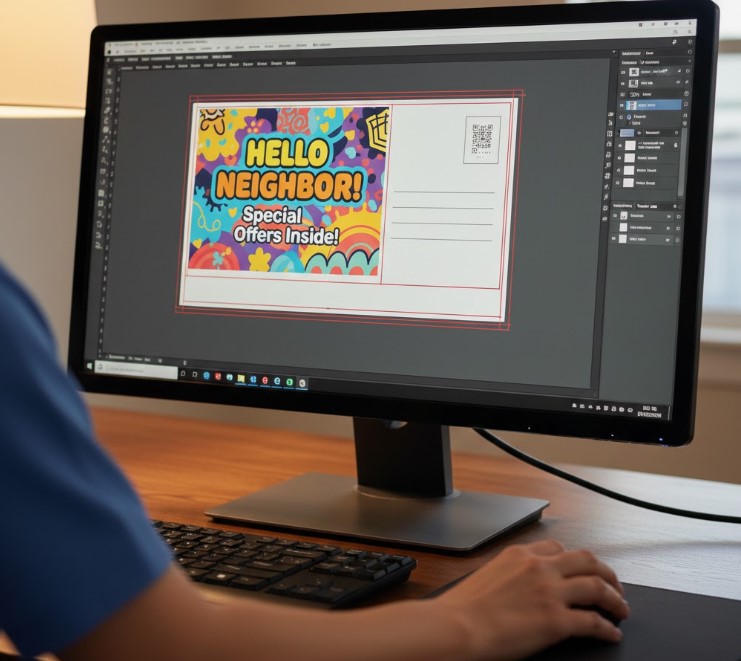
How to Set Up Your File: Canva, Illustrator, InDesign
Standard Postcard Template Sizes and USPS Specifications
Postcards are the most common direct mail format and the most cost-effective. The USPS defines three postcard tiers — each with different postage rates, minimum/maximum size limits, and template requirements.
Postcard Size Reference Table
| Format | Minimum Size | Maximum Size | Most Popular Dimensions | Postage Class |
|---|---|---|---|---|
| USPS Postcard Rate | 3.5″ × 5″ | 4.25″ × 6″ | 4″ × 6″ | Postcard (lowest rate) |
| Standard Marketing Mail | 3.5″ × 5″ | 6.125″ × 11.5″ | 5″ × 7″ or 6″ × 9″ | Standard/Bulk rate |
| First-Class Postcard | 3.5″ × 5″ | 4.25″ × 6″ | 4″ × 6″ | First Class |
| Large Postcard / Flat | 6.125″ × 11.5″ | 12″ × 15″ | 6″ × 11″ or 9″ × 12″ | Flat rate (higher than postcard) |
Thickness requirement: All postcards must be at least 0.007″ thick (approximately 14pt cardstock). Pieces thinner than this are non-machinable and will either be rejected or charged a higher rate.
Template Setup Dimensions: 4″ × 6″ Postcard (Most Common)
| Layer | Dimension | Purpose |
|---|---|---|
| Bleed (full canvas) | 4.25″ × 6.25″ | Background extends beyond trim edge to prevent white borders |
| Trim (final cut size) | 4″ × 6″ | Actual finished size after cutting |
| Safe zone (keep text inside) | 3.75″ × 5.75″ | All important text and logos must stay inside this boundary |
| Bleed margin per side | 0.125″ (⅛”) | How far background extends beyond the trim line on each side |
| Safe zone margin per side | 0.125″ (⅛”) | Distance to keep all critical content from the trim edge |
Template Setup Dimensions: 6″ × 9″ Postcard
| Layer | Dimension |
|---|---|
| Bleed canvas | 6.25″ × 9.25″ |
| Trim size | 6″ × 9″ |
| Safe zone | 5.75″ × 8.75″ |
Rule of thumb for any size: Add 0.125″ to each dimension for the bleed canvas. Subtract 0.125″ from each dimension for the safe zone boundary.
EDDM Template — Every Door Direct Mail Dimensions
EDDM (Every Door Direct Mail) is a USPS program that delivers to every address on a selected mail carrier route — no mailing list required. It is ideal for local businesses targeting a specific neighborhood or ZIP code. The template requirements are stricter than standard postcards because EDDM pieces must qualify as “flats.”
EDDM Size Requirements
To qualify as EDDM Retail, a mail piece must meet ALL of the following:
Maximum weight: 3.3 oz
At least one dimension must exceed 6.125″ OR 11.5″ (this is what makes it a “flat”)
No dimension may exceed 12″ × 15″
Minimum thickness: 0.007″ (14pt cardstock minimum — same as standard postcards)
Maximum thickness: 0.75″
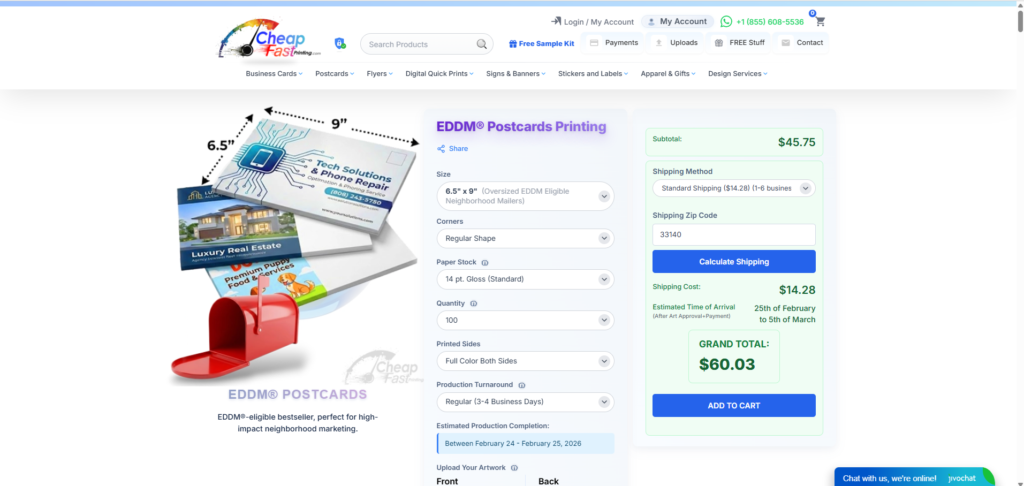
EDDM Template Sizes: Most Popular Options
| EDDM Size | Bleed Canvas | Trim Size | Safe Zone | Best Use |
|---|---|---|---|---|
| 6.5″ × 9″ | 6.75″ × 9.25″ | 6.5″ × 9″ | 6.25″ × 8.75″ | Entry-level EDDM, budget-friendly |
| 6″ × 11″ | 6.25″ × 11.25″ | 6″ × 11″ | 5.75″ × 10.75″ | High visibility, wide format mailbox presence |
| 6.5″ × 12″ | 6.75″ × 12.25″ | 6.5″ × 12″ | 6.25″ × 11.75″ | Maximum visual impact, restaurants and retail |
| 9″ × 12″ | 9.25″ × 12.25″ | 9″ × 12″ | 8.75″ × 11.75″ | Dominant mailbox presence, premium campaigns |
| 8.5″ × 11″ | 8.75″ × 11.25″ | 8.5″ × 11″ | 8.25″ × 10.75″ | Letter-size flyers, menus, full-page ads |
EDDM-Specific Indicia Requirements
Standard “Presorted” or “First Class” permit indicators do not work for EDDM. EDDM pieces must use one of these two exact indicia formats:
- EDDM Retail indicia — for pieces taken directly to the Post Office by the mailer
- EDDM BMEU indicia — for pieces dropped at a Business Mail Entry Unit with a bulk permit
The indicia must be placed in the upper right area of the address side, within a 1″ × 1.25″ space. It must clearly show “EDDM Retail” or “EDDM BMEU” — a generic “PAID” stamp does not qualify.
The address line for all EDDM pieces is always: Local Postal Customer. You do not need individual names or addresses.
Letter and Folded Mailer Specifications
| Format | Finished Size | Bleed Canvas | Safe Zone | Notes |
|---|---|---|---|---|
| Standard Letter (envelope) | 3.5″–6.125″ × 5″–11.5″ | +0.125″ per side | −0.125″ per side | Must fit in envelope — no exposed edges |
| Self-Mailer Bi-Fold | Up to 6″ × 10.5″ (folded) | +0.125″ per side | −0.125″ per side | Requires 2 wafer seals on open edge |
| Self-Mailer Tri-Fold | Up to 6″ × 10.5″ (folded) | +0.125″ per side | −0.125″ per side | Open edge at bottom for machine compatibility |
| Booklet Mailer | 3.5″–6.125″ × 5″–10.5″ | +0.125″ per side | −0.125″ per side | Bound edge must be at right or top |
Wafer seal requirement for folded mailers: Any self-mailer with an open edge (bi-fold, tri-fold) must be secured with at least two wafer seals (tabs) on the open edge. Seals must be at least 1″ diameter. Plan your design so no critical text, face, or phone number sits in the seal placement zone — typically the center and edge of the open flap.
Required Clear Zones on Every Mail Piece
These zones exist on the address side of every mail piece, regardless of format. Violating any of them is the most common reason campaigns get rejected or returned.
Barcode Clear Zone (Bottom Right Corner)
The USPS automated sorting system sprays an intelligent mail barcode in the bottom-right corner of every piece. This zone must be completely empty — no text, no images, no background color other than white.
- Width: 4.75″ (measuring from the right edge, toward the left)
- Height: 0.625″ (measuring from the bottom edge, upward)
- Fill: Must be white or very light — no color, no pattern, no fine print
Address Block Placement Rules
The delivery address must fall within a specific vertical window on the address side of the mail piece. If the address block drifts outside this window, optical character readers miss it and the piece is rejected.
- Bottom boundary: Address block must begin at least 0.625″ from the bottom edge
- Top boundary: Address block must not exceed 2.75″ from the bottom edge
- Left boundary: At least 0.5″ from the left edge
- Right boundary: At least 0.5″ from the right edge (and outside the barcode zone)
- Minimum font size: 8pt for all address text — no script or decorative fonts
Indicia Placement (Upper Right)
The permit indicia (the “PAID” stamp showing postage has been purchased) must sit in the upper-right area of the address side within a space no larger than 1.25″ × 1.5″. It must be clearly legible — blurry or undersized indicia is treated the same as missing postage.
Return Address Placement (Upper Left)
A return address is required on any mail piece using Ancillary Service Endorsements (such as “Return Service Requested” or “Address Service Requested”). It must be in the upper-left area of the address side and clearly readable at standard font sizes.
Aspect Ratio Rules and the Non-Machinable Trap
Aspect ratio is the piece’s length divided by its height. The USPS requires a specific aspect ratio range for automated (machinable) processing. Fall outside this range and you pay a non-machinable surcharge — currently $0.30–$0.40 per piece — that can wipe out your postage budget on a large mailing.
Required aspect ratio: 1.3 to 2.5
| Size | Aspect Ratio | Machinable? | Notes |
|---|---|---|---|
| 4″ × 6″ | 1.50 | ✅ Yes | Standard postcard — always compliant |
| 5″ × 7″ | 1.40 | ✅ Yes | Within range — compliant |
| 6″ × 9″ | 1.50 | ✅ Yes | Standard compliant size |
| 6″ × 6″ | 1.00 | ❌ No | Square — non-machinable surcharge applies |
| 5.5″ × 8.5″ | 1.55 | ✅ Yes | Half-letter — compliant |
| 4″ × 4″ | 1.00 | ❌ No | Square — surcharge applies |
| 4″ × 10″ | 2.50 | ✅ Yes (barely) | Right at the upper limit — verify before printing |
| 3.5″ × 9″ | 2.57 | ❌ No | Exceeds 2.5 ratio — non-machinable |
If your design concept requires a square format, you have two options: accept the non-machinable surcharge and factor it into your postage budget, or adjust the dimensions so the longer side is at least 1.3× the shorter side.
Bleed, Resolution, and Color Mode Requirements
Bleed
Bleed is the extension of your background artwork beyond the trim (cut) line. It exists because cutting machines have a small tolerance — without bleed, even a perfectly aligned cut can leave a thin white border along one or more edges.
- Required bleed: 0.125″ (⅛ inch) on all four sides
- Any background color, pattern, or image that reaches the edge of the design must extend 0.125″ beyond the trim line
- White or light-colored backgrounds near an edge still technically need bleed — but the impact of missing it is less visible
Resolution
- Minimum: 300 DPI at final print size
- Images placed at 72 DPI (screen resolution) will print blurry and pixelated — this is the most common file error we see
- When scaling an image up in your layout, DPI decreases. A 300 DPI image scaled to 200% of its original size becomes 150 DPI — too low for print
- Check: In Photoshop, Image → Image Size. Set resolution to 300 DPI at the exact size the image will print
Color Mode
- Required: CMYK color mode for all print-ready files
- RGB is the color mode used by screens and cameras — colors look vivid on-screen but shift when converted to CMYK for printing
- Bright oranges, electric blues, and neon greens are the most common colors that shift significantly between RGB and CMYK
- Design in CMYK from the start, or request a color proof before printing a large run
- We convert RGB files at no charge, but colors will shift — designing in CMYK gives you accurate control over the final result
EDDM vs. Standard Direct Mail — Key Differences at a Glance
| Factor | Standard Direct Mail | EDDM (Every Door Direct Mail) |
|---|---|---|
| Mailing list | Required — specific names and addresses | Not required — delivers to every address on a route |
| Minimum quantity | 200 pieces (Standard Marketing Mail) | 200 pieces per carrier route |
| Postage cost | ~$0.23–$0.55 per piece depending on class | ~$0.239 per piece (EDDM Retail flat rate, 2026) |
| Required size | 3.5″×5″ minimum to 6.125″×11.5″ maximum (postcard) | Must qualify as “flat” — at least one dimension over 6.125″ or 11.5″ |
| Address on piece | Specific recipient name and address | “Local Postal Customer” only |
| Indicia type | Presorted Standard / First Class | EDDM Retail or EDDM BMEU — no substitution |
| Best for | Existing customer lists, targeted B2B outreach, personalized offers | Local awareness, new movers, neighborhood saturation, restaurants, real estate |
How to Set Up Your Template File in Common Design Tools
Canva
- Create a new Custom Size design. Enter your bleed canvas dimensions (e.g., 4.25″ × 6.25″ for a 4×6 postcard)
- Draw a rectangle at the trim size (4″ × 6″) centered on the canvas — this is your visual guide for the cut line
- Draw a second rectangle at the safe zone size (3.75″ × 5.75″) centered on the canvas — keep all text and logos inside this
- Design normally, keeping backgrounds extended to canvas edges and all critical content inside the safe zone rectangle
- When downloading: choose PDF Print → enable “Crop marks and bleed” → download
- Important: Canva outputs RGB by default. Our team converts this to CMYK during file processing.
Adobe Illustrator
- New Document → set Artboard to your trim size (e.g., 4″ × 6″)
- In Document Setup → Bleed, enter 0.125″ on all sides — Illustrator adds this automatically to your artboard
- In Preferences → Guides, set a guide at 0.125″ inside the artboard on all sides to mark your safe zone
- Set color mode to CMYK: File → Document Color Mode → CMYK
- Save as PDF using the [PDF/X-1a:2001] preset — this embeds all fonts and maintains CMYK
Adobe InDesign
- New Document → set page size to your trim size
- In Bleed and Slug, enter 0.125″ for all bleed values
- In Margins, set all margins to 0.125″ — these represent your safe zone boundary
- Export as PDF → PDF/X-1a → check “Use Document Bleed Settings”
Google Slides or PowerPoint
Not recommended for print-ready direct mail files. These applications output at screen resolution (72–96 DPI), cannot reliably export CMYK, and do not support proper bleed settings. If your file was created in either application, we can convert it — but some quality loss and color shift is expected. For best results, move to Canva or Illustrator.
Pre-Mail Compliance Checklist
Run through every item before submitting your file to print. Each unchecked item is a potential rejection point at the USPS.
| Check | Requirement | Common Mistake |
|---|---|---|
| ☐ | Piece size within min/max for mail class | Designing at 4.25″×6.25″ (bleed canvas) instead of 4″×6″ trim size |
| ☐ | Aspect ratio between 1.3 and 2.5 | Choosing a square format without accounting for surcharge |
| ☐ | 0.125″ bleed on all four sides | Backgrounds stopping at trim line — causes white-edge hairlines after cutting |
| ☐ | All critical content inside safe zone (0.125″ from trim) | Phone numbers or URLs within 0.1″ of the edge — gets trimmed off |
| ☐ | Barcode clear zone empty (bottom-right 4.75″ × 0.625″) | Placing website URL or contact info at bottom of address side |
| ☐ | Address block within vertical window (0.625″–2.75″ from bottom) | Address block centered on the piece instead of anchored in the required zone |
| ☐ | Address font minimum 8pt, non-script | Using a stylized or handwritten font for the delivery address |
| ☐ | Correct indicia in upper right (right type for right service) | Using a Standard Mail indicia on an EDDM piece — automatic rejection |
| ☐ | Return address in upper left | Omitting return address — required for ancillary endorsements |
| ☐ | All images at 300 DPI at print size | Pulling images from websites (72 DPI) and placing them in layouts |
| ☐ | File in CMYK color mode | Exporting from Canva or Photoshop without converting from RGB |
| ☐ | Wafer seals accounted for in folded mailer design (if applicable) | Placing a face photo or primary headline exactly where a seal will be applied |
| ☐ | Minimum 14pt cardstock specified in print order | Ordering on 100lb text stock — fails USPS thickness minimum |
Frequently Asked Questions
What is the standard USPS direct mail template size?
The most common and cost-effective USPS direct mail template is the 4″ × 6″ postcard, which qualifies for the lowest postcard postage rate. For EDDM campaigns, the most popular template size is 6.5″ × 9″ — it qualifies as an EDDM flat while keeping printing and postage costs manageable. When setting up your file, always work at the bleed canvas size (add 0.125″ to each dimension) and design critical content within the safe zone (subtract 0.125″ from each dimension).
What is the EDDM template size requirement?
EDDM pieces must qualify as “flats” — meaning at least one dimension must exceed 6.125″ or 11.5″. The most popular EDDM template sizes are 6.5″×9″, 6″×11″, and 9″×12″. No dimension may exceed 12″×15″. Pieces must also use the specific EDDM Retail or EDDM BMEU indicia — standard First Class or Presorted indicia will cause rejection.
How do I add bleed to my direct mail template?
Add 0.125″ to all four sides of your trim size to get the bleed canvas. For a 4″×6″ postcard, your bleed canvas is 4.25″×6.25″. In Illustrator and InDesign, set the bleed in document setup and the software draws the bleed boundary automatically. In Canva, set your custom canvas to the bleed size manually and keep track of your trim and safe zone using guide rectangles.
Can I put a design or image behind the address block?
You can use a light background behind the address block, but it must provide high contrast with the dark address text — ideally white or very light gray. A busy patterned or dark background behind the address area makes it harder for USPS optical readers to read the delivery ZIP code and risks rejection. Keep the address zone visually clean regardless of what you do on the rest of the card.
What happens if my direct mail template is non-compliant?
Outcomes depend on the specific violation. Pieces with missing or incorrect indicia are rejected outright at the post office — they never mail. Pieces with barcode zone violations get the barcode sprayed over your design, making it look unprofessional. Non-machinable pieces (wrong aspect ratio, wrong thickness) get charged a per-piece surcharge that can run $0.30–$0.40 extra per piece. Pieces with address block errors outside the required zone may be returned to sender or delivered late as they require manual sorting.
Do you provide USPS direct mail templates I can download?
Yes — when you place a direct mail order with Cheap FAST Printing, we provide print-ready templates in PDF, AI (Illustrator), and Canva format for your specific size at no charge. If you have already designed your piece, upload your file here and our production team will review it against all USPS specifications before it goes to press. We flag every compliance issue and notify you before printing.
What is the minimum quantity for USPS direct mail?
Standard Marketing Mail (bulk rate) requires a minimum of 200 pieces or 50 pounds, whichever is greater. First-Class bulk mail requires a minimum of 500 pieces. EDDM Retail requires a minimum of 200 pieces per carrier route and a maximum of 5,000 pieces per day per ZIP code. If you are mailing fewer than 200 pieces, First-Class single-piece rates apply — no bulk permit required.
Ready to Print Your Direct Mail Campaign?
All direct mail orders at Cheap FAST Printing include a free USPS compliance review before your job goes to press. We check every file for barcode zone violations, indicia placement, bleed, resolution, and aspect ratio — and send you a notification before printing if anything needs adjustment.
Standard turnaround is 3–5 business days. Rush options are available. Browse direct mail products and get an instant quote →